This post is a continuation of the last post which introduces the SIFT algorithm as well as some info on OpenCV in openFrameworks through the ofxCv addon. This post is going to be a change of pace, less tutorial-esque and more experimental. I’ll still try and distill what I’m doing into a guide-like format – but I’m literally writing this while I’m coding, so errors and failures (and hopefully, happy accidents) will be part of the process.

The Blank Page
Here’s how I use XCode –
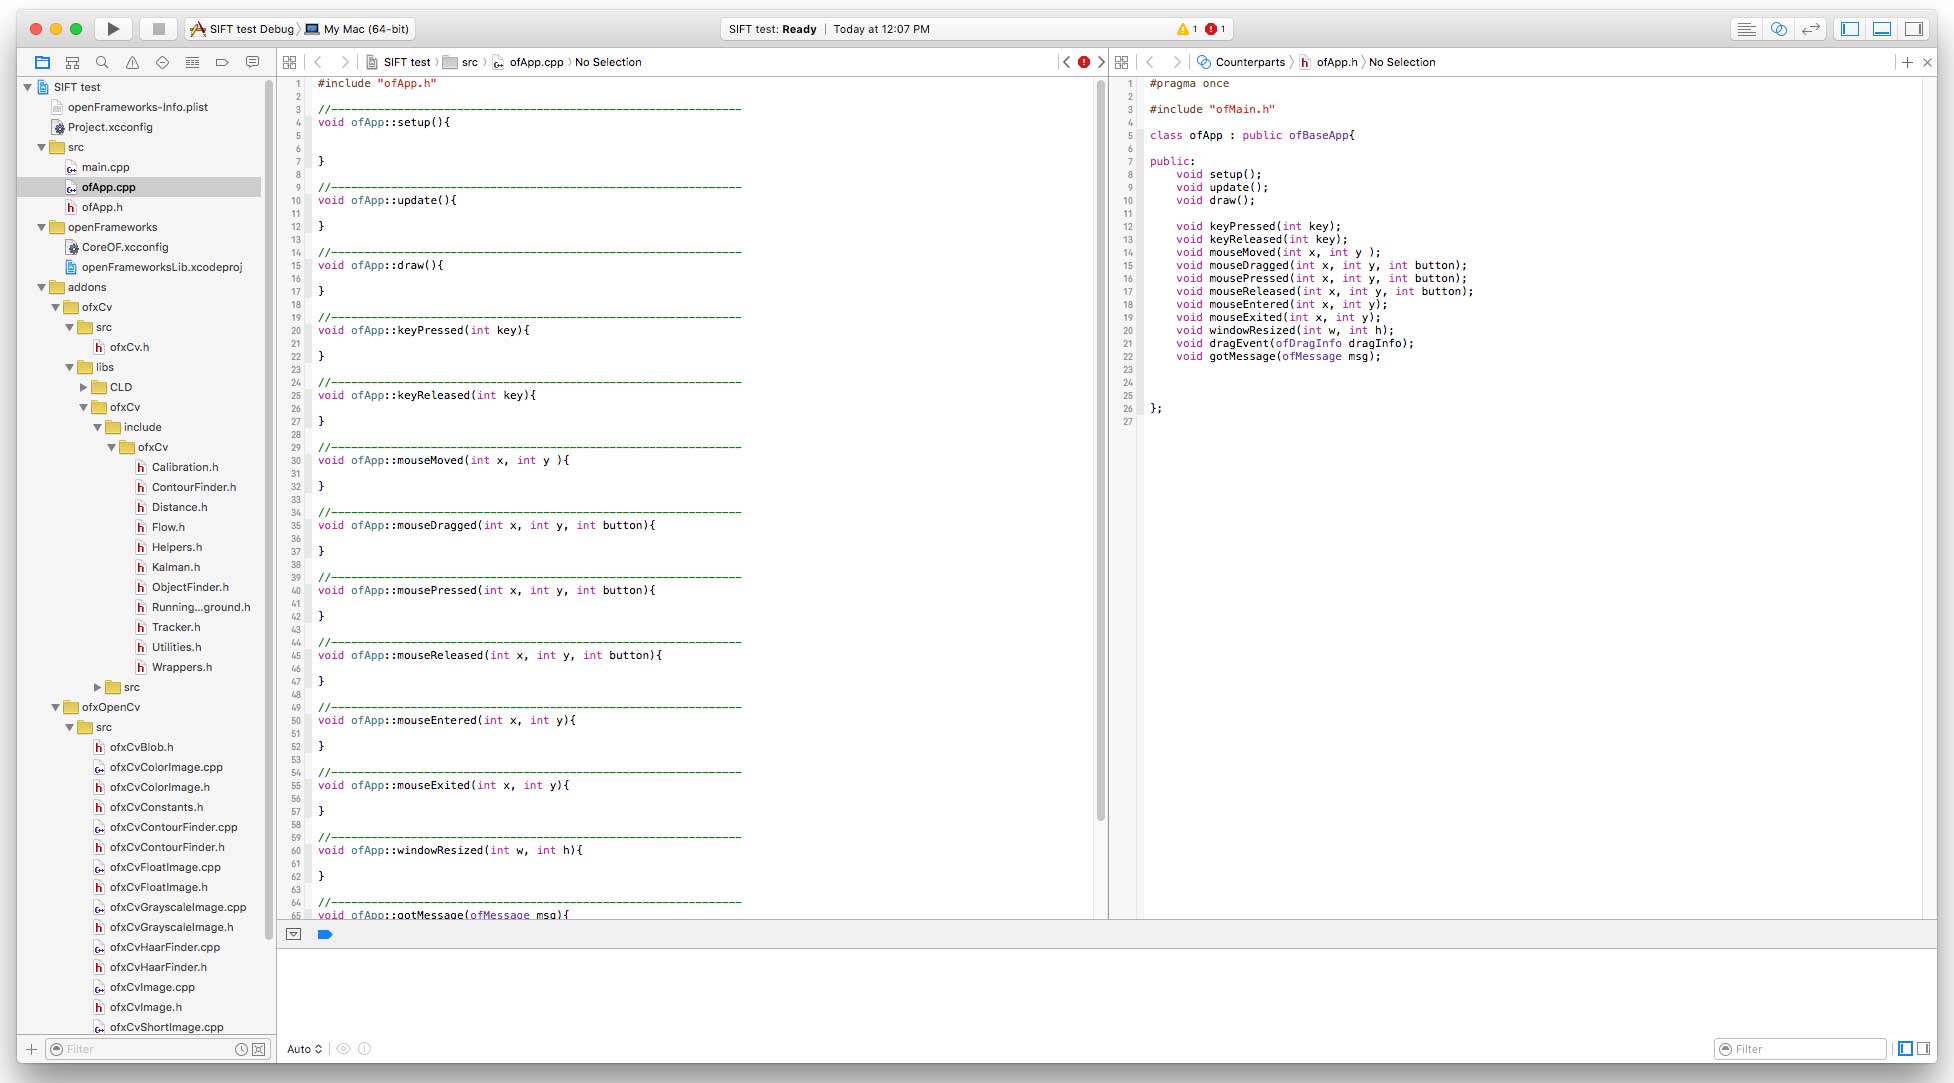
I have my .cpp file open on the left, and the related header file (.h or .hpp) open on the right. If you select “Counterparts” at the top of the Assistant Editor panel on the right, XCode will always display the appropriate header file when you navigate to a different .cpp file.
Include the Libraries
The first thing to do is include the main header files for the project’s addons – so in ofApp.h (on the right), I’m adding at the top:
#pragma once

#include "ofMain.h"

// include addons
#include "ofxOpenCv.h"
#include "ofxCv.h"

// include "nonfree" OpenCV modules
#include "opencv2/nonfree/nonfree.hpp"

// use OpenCV and ofxCv namespaces
using namespace cv;
using namespace ofxCv;
SIFT Isn’t Free
Note the extra #include “opencv2/nonfree/nonfree.hpp” line there. This is necessary to access to the SIFT functions in OpenCV, because by default they’re not automatically included with the rest of the library. That’s because the SIFT algorithm is patented. It’s one of the few parts of OpenCV that aren’t free for commercial use, so they make you include it manually.
Using Namespaces
ofxCv’s “ofxCv” namespace plays nicely with the OpenCV namespace, “cv”, so you can use both in the project. Adding the two namespace lines above means you can write Mat instead of cv::Mat, and toCv() instead of ofxCv::toCv(). That will give you back a few precious seconds of typing over your lifespan. Plus, ofxCv actually uses namespace conflicts to your advantage in order to overload OpenCV functions, meaning you can sometimes call OpenCV functions with openFrameworks arguments.
SIFT Reference Material
There’s not a lot of information on using SIFT in C++ OpenCV out there. The best I’ve found is Chris McCormack’s post, and he very helpfully uploaded his well-commented code. I’m basing my implementation on his version (which he based on the SURF feature matching sample code from the OpenCV docs).
There’s also an OpenCV tutorial on SIFT in Python, and a general explanation of how SIFT works on AI Shack (without any code). Or you can read David Lowe’s original paper introducing SIFT here.
Pseudo-code Implementation of SIFT
Here are the steps:
// load the 2 images as ofImage objects
// convert them to grayscale (SIFT uses grayscale)
// convert them to OpenCV Mat objects

// Run the SIFT Keypoint Detector on each Mat
// Run the SIFT Feature Descriptor on the keypoints

// Use a Match function to find matching features
// Display the results
So close, and yet so far.
The Actual SIFT Code
Here’s where I’ll stop the line-by-line tutorial. The app code is on my GitHub repo for this blog (under SIFTtest), so you can check that out and re-use it if you like. Here’s a direct link to the ofApp.cpp file with the guts of the code if you just want to check it out in the browser.
I’ve labored mightily to comment it so it’s readable to future-me and hopefully whoever else stumbles on it.
What I will give you here is a stripped down version of the app. Everything below is done in ofApp::setup():
// load the images
ofImage findImg, fieldImg;

findImg.load("peeping_tom_1.jpg");
// image we're looking for ("query" in OpenCV)
fieldImg.load("peeping_tom_2.jpg");
// image to search in ("train" in OpenCV)

// convert to grayscale for SIFT
findImg.setImageType(OF_IMAGE_GRAYSCALE);
fieldImg.setImageType(OF_IMAGE_GRAYSCALE);

// wrap in Mat
Mat findMat = toCv(findImg);
Mat fieldMat = toCv(fieldImg);

SiftFeatureDetector detector(10000);
// SIFT detector object

vector<KeyPoint> findKeypoints, fieldKeypoints;

//run detector
detector.detect(findMat, findKeypoints);
detector.detect(fieldMat, fieldKeypoints);

SiftDescriptorExtractor extractor;
// SIFT descriptor object

//run descriptor
extractor.compute(findMat, findKeypoints, findDescriptors);
extractor.compute(fieldMat, fieldKeypoints, fieldDescriptors);

BFMatcher matcher(NORM_L2);
// Brute-force Matcher object

vector<DMatch> matches;

// run the matcher
matcher.match(findDescriptors, fieldDescriptors, matches);

// visualize matches in new image-matrix
Mat matchMat;
drawMatches(findMat, findKeypoints, fieldMat, fieldKeypoints, matches, matchMat);

// now draw matchMat in ofApp::draw() to see the results
Unhappy Accidents
What I’ll document from here on out are the mistakes and pitfalls I encountered while getting the code to work, with a bit of what I learned along the way.
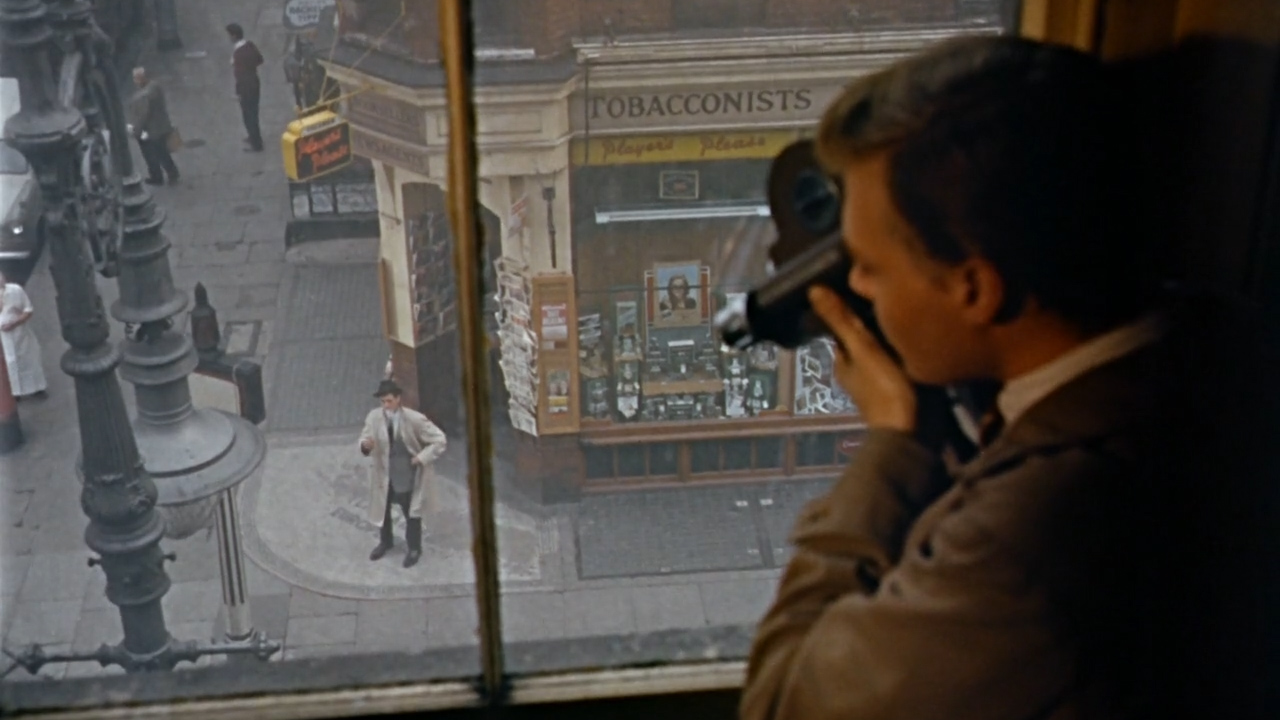
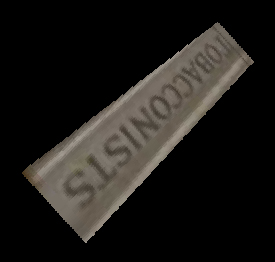
As a reminder, here’s the image were searching for:
and here’s the image in which we’re trying to find it:
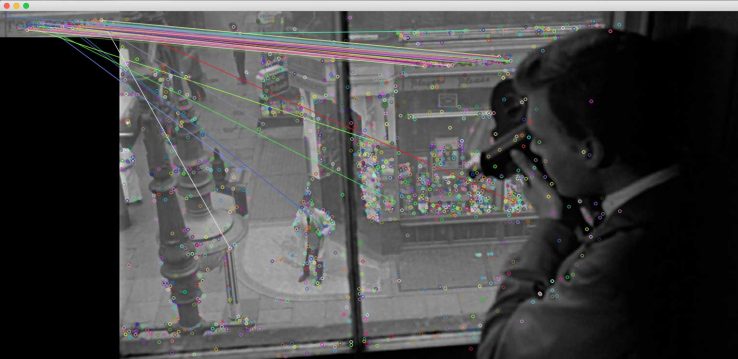
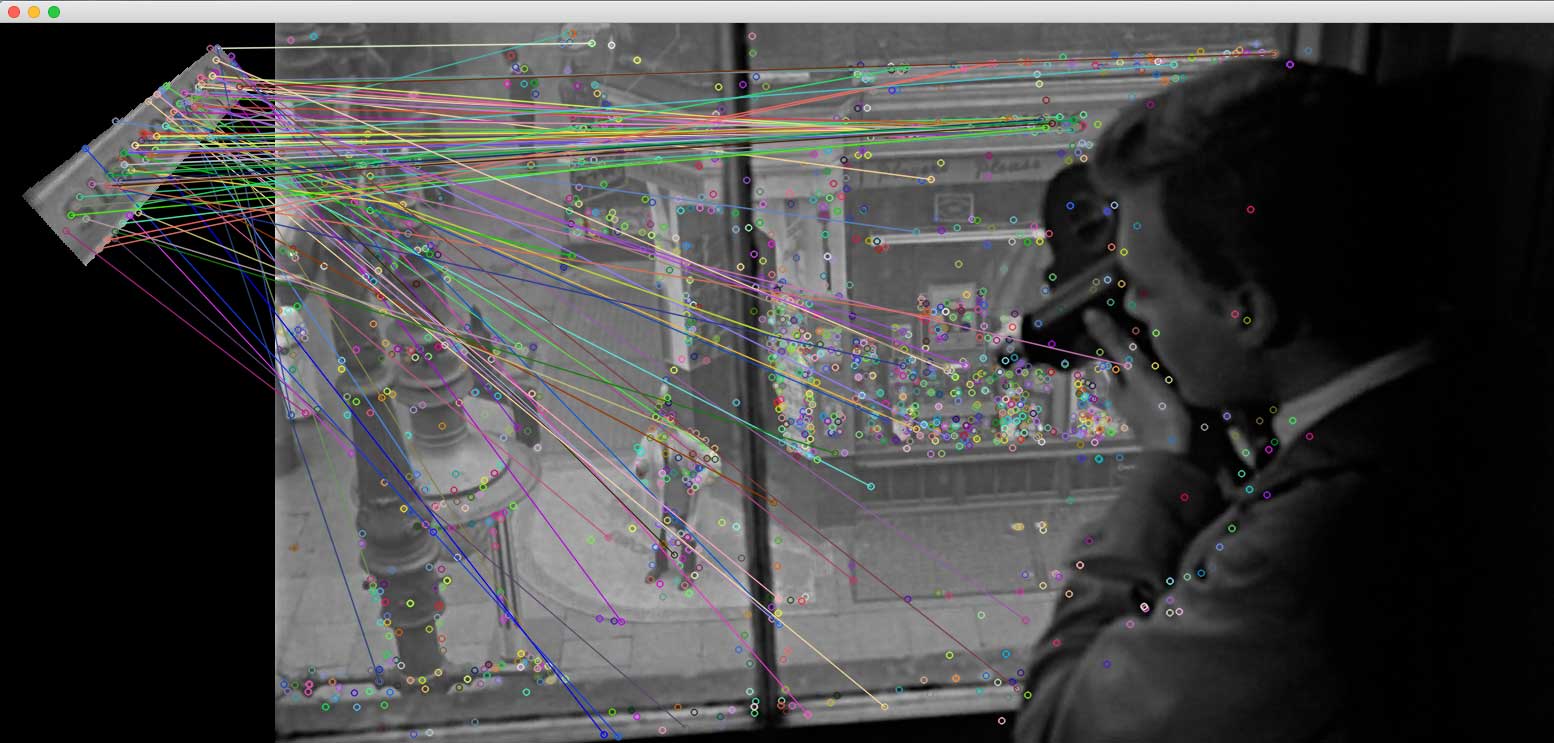
Here’s what I ended up with on the first run:
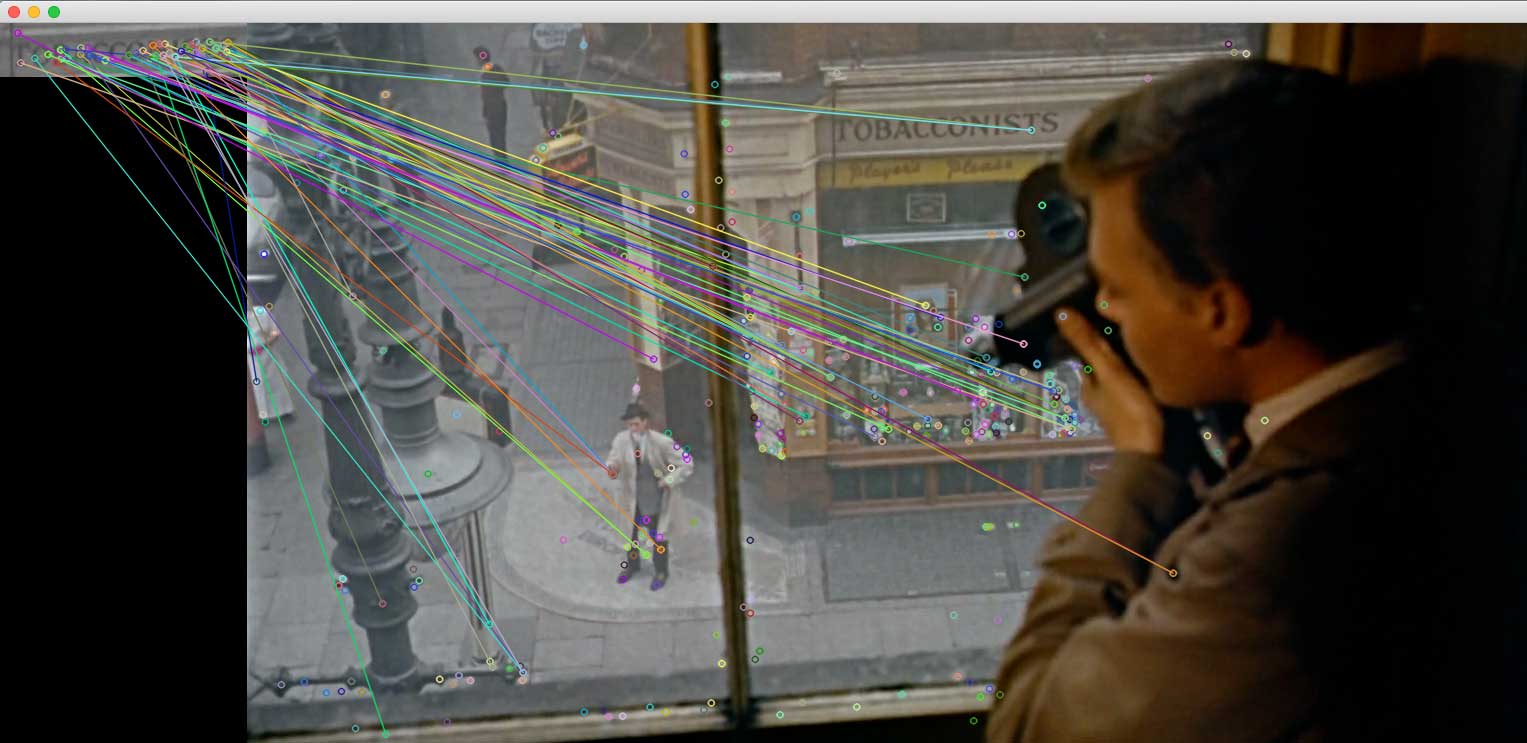
Yeah, so…
The way the OpenCV drawMatches() function visualizes the results here is by placing the images side-by-side, then circling the keypoints in each image and drawing lines between the ones it matched.
Clearly, these results are so very wrong. Ideally all the lines from the left should go straight to the sign in the full image on the right. One the plus side (?), it found matches for every keypoint in the cropped image (more on this in the matcher section below). So what went wrong?
For starters, the image on the right is in color, when it should be grayscale. After about 30 minutes, I found a typo: I was making findImg grayscale twice, instead of findImg and then fieldImg. I had a feeling using alliterative variable names would haunt me when I chose them, but it seemed so sonorous at the time.
So I fixed it:
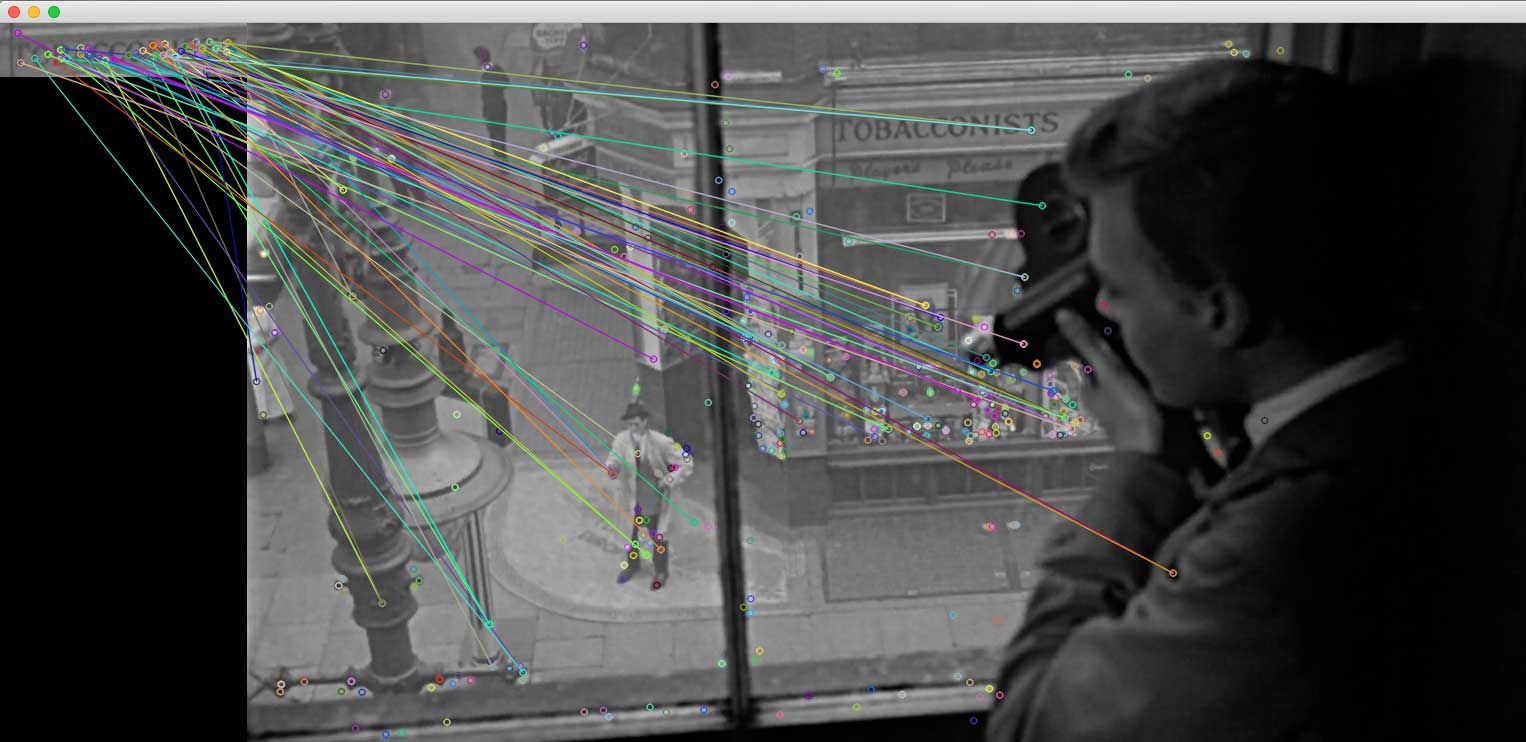
Identically awful results. I did one more try, after diving headfirst into the shallow end of the OpenCV docs to try and figure it out. In the matcher function, I changed BFMatcher matcher(NORM_L2); to BFMatcher matcher(NORM_L1); because reasons.
A couple different matches, but still batting .000…
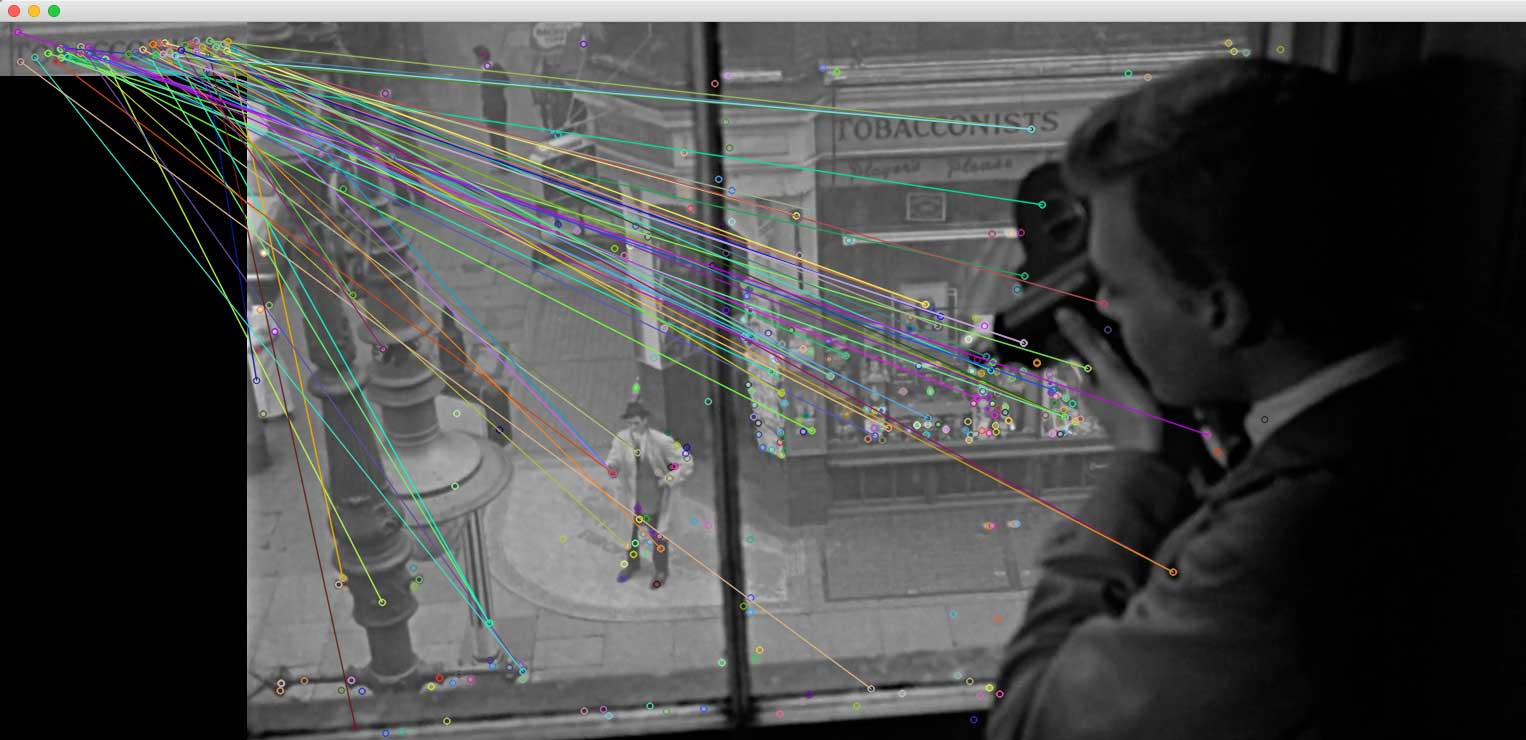
Solution
The root of the problem was staring me in the face, as it tends to do. You can see in the visualizations above that only 1 solitary keypoint was detected on the sign in the image on the right, though there were many detected on the cropped image (61 to be exact).

If the SIFT keypoint detector doesn’t detect keypoints, it can’t match them… (what’s the sound of one keypoint clapping?). The issue was that I had copy-pasted some code from Chris McCormack without really understanding it fully.
Namely, this was how I constructed the SIFT feature detector:
SiftFeatureDetector detector(400);
// SIFT detector object
The “400” argument tells the detector the max number of keypoints it should find. I guess the detector thought that there were a bunch of really awesome keypoints scattered around the full image, but only one measly keypoint worth noting on the sign.
To fix this, I did some testing. I actually cranked the argument up to 100000:
SiftFeatureDetector detector(100000);
And here’s the result:
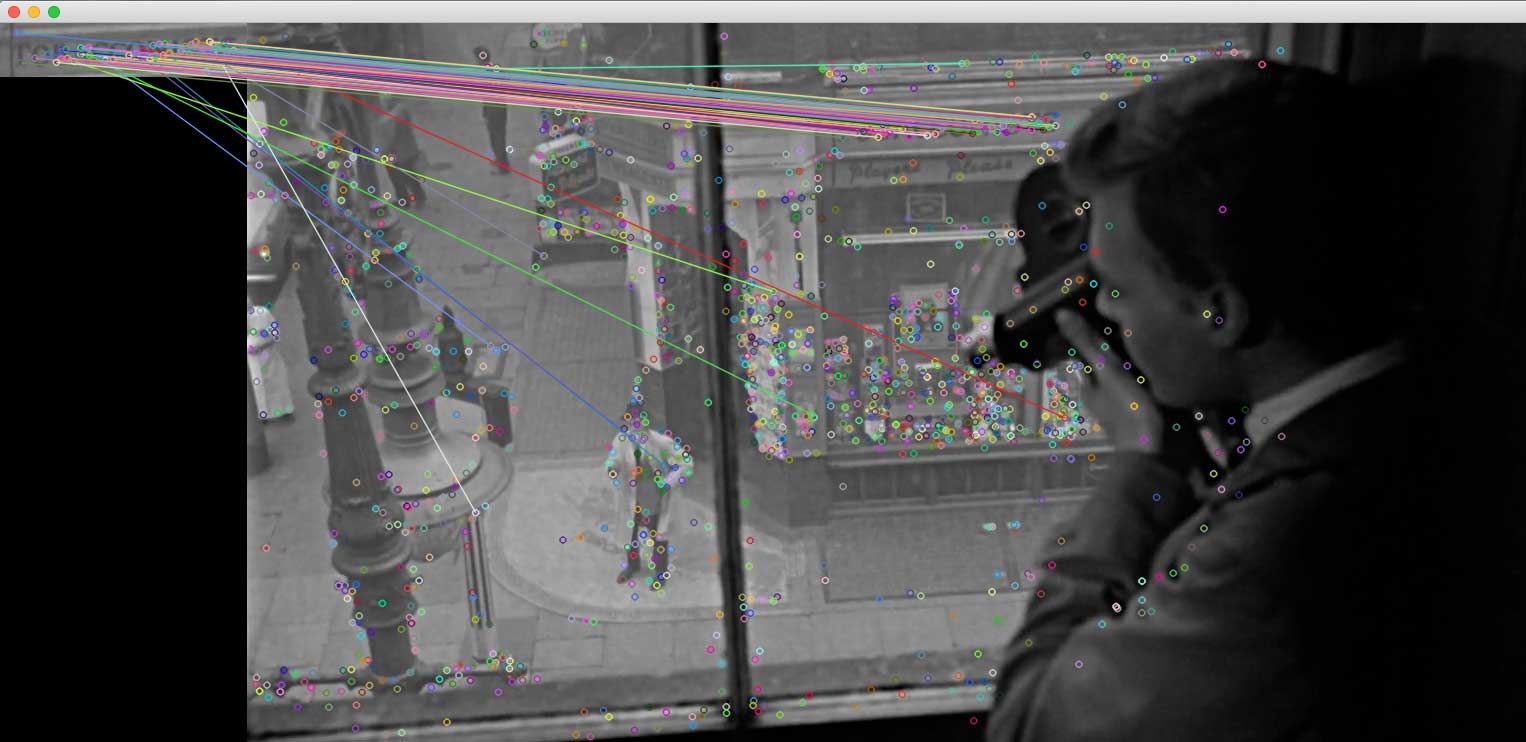
Sweet, sweet solid lines running straight (well, pretty straight) from the sign on the left to the sign on the right. Looking at some info I printed to the console, I realized that 100000 keypoints was complete overkill. SIFT was only actually finding 1597 keypoints in the image on the right. So I decreased down to 2000 max keypoints:
SiftFeatureDetector detector(2000);
Speed
Interestingly, the 100000 argument barely increased the computation speed from the earlier version. It’s still mighty slow, taking about 700 ms to do the detection and description. Oddly it only takes 1ms to do the matching.
The Matcher
The SIFT algorithm takes care of keypoint detection and feature description. It doesn’t do the actual matching of keypoints. For that, I’m using the matching function that Chris McCormack used: BFMatcher(). I may try other types of keypoint matchers in a future iteration.
BFMatcher stands for Brute-Force Matcher. From what I can tell from the OpenCV documentation, it’s actually pretty simple: it loops through all the keypoints in image 1, comparing each keypoint’s feature set to every keypoint feature set in image 2 (using a sort of n-dimensional distance function from what I gather). By the end of that, it chooses the best match for each keypoint. I figured this would be a very computationally expensive function, which is why I was surprised at the speed (<1 ms, at least in this case).
I haven’t quite figured out yet whether BFMatcher will always choose a match for every keypoint in image 1 (as it did in all of my tests), or if there is some threshold at which point it will decide a keypoint from image 1 has no match. Anyway, if there’s no threshold (or it’s low), that might be the reason it’s matching all 61 keypoints from the cropped image, even when the match isn’t correct.
One More Thing: 3D Rotation
After this wild success, I tried one more thing. I took the cropped image into Photoshop and did a rotation and perspective warp on it, just to check how SIFT would handle that. Here’s the new search image:
And here’s the result, using the same code as before:
A little messy, but actually, still pretty good. Hard to tell, but I think it identified about half of the keypoints correctly (so about 30 correct matches), which seems good enough.
Next (… next… next…)
In the next post, I’ll first try and figure out how to algorithmically confirm a match, so everything is automated. Then I’ll try matching objects from two completely different images. Lastly, I’ll try to bust the keypoint match information out of its OpenCV chrysalis, so it can be a more useful butterfly for fancy visualization in openFrameworks. I may also touch on other keypoint/feature detection algorithms that promise much higher speed than SIFT, like ORB and BRIEF. Those are designed for real-time detection…
In the next-next post, I’ll move onto Optical Flow, which should be easier since it’s baked into ofxCv. And then, in the next-next-next post, I’ll start looking at how to search a database of images for matching keypoints and optical flow values.